

How To Clean Epson Wf-2530 Print Head
If your Epson printer starts printing faint or incomplete prints, then most probably its impress head nozzles are clogged-up. This is a mutual problem with inkjet printers, which can be hands resolved if y'all know the right process and have all the necessary tools. However, virtually users terminate-up spending a good corporeality of money on a service engineer to resolve this problem. To aid all such users, we have prepared this guide, in which nosotros will describe the easiest mode to make clean Epson print head nozzles which are blocked or clogged.
Causes behind Print Head Blocking or Bottleneck
Blocking or clogging of print head nozzles can happen due to drying of ink. Suppose, you lot got a low ink warning and instead of replacing the cartridge you kept using information technology, then whenever you volition put-in the new cartridge you may find the nozzles take been blocked due to inactivity. Similarly, if your printer hasn't been used for a long time, and then the ink will dry upward and cause bottleneck of print caput nozzles.
Basically, clogging happens due to the inactivity of your print cartridge nozzles. Knowing this reason is of import as it volition let you to avert this trouble in the future. Anyway, right now let's focus on how to clean Epson print head nozzles which are blocked or clogged.
Things Required For Cleaning Print-Head & Nozzles

- Make clean solution or distilled water
- One syringe
- I silicon tube
- Paper towel
How to Clean Print Caput & Nozzles (for Ink-Tank Printer)
To complete this cleaning process you will crave a cleaning solution, syringes, silicon tubes, plastic strips and paper towels. Once you take arranged everything, follow the steps given below.
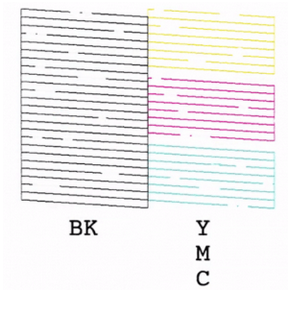
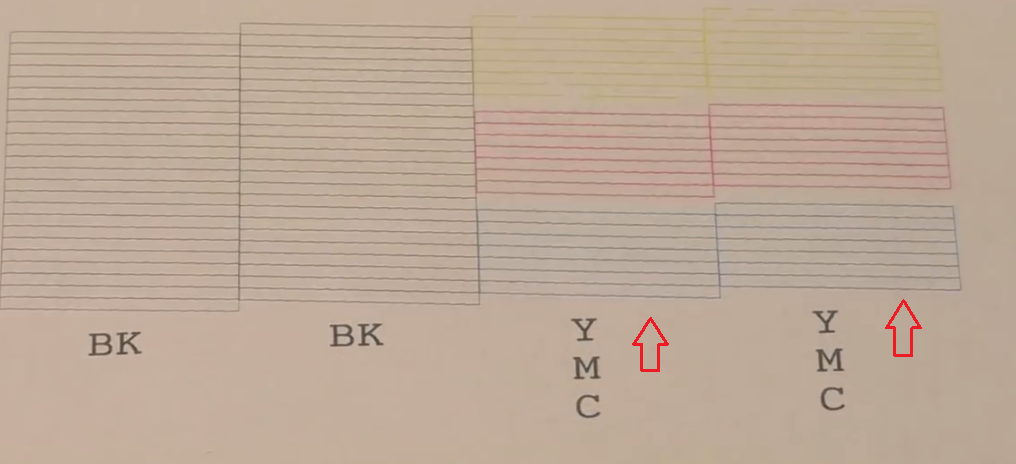
- To find out which nozzles are blocked you lot should print the nozzle exam pattern. In this example, you can see that all the nozzles are blocked. So, we volition depict the cleaning process for i nozzle, which can then be repeated for other nozzles.
- Open the upper-encompass of your printer so that its print head compartment is visible.
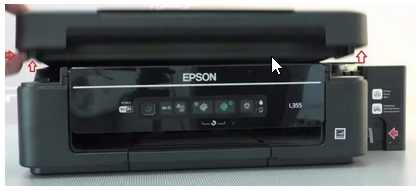
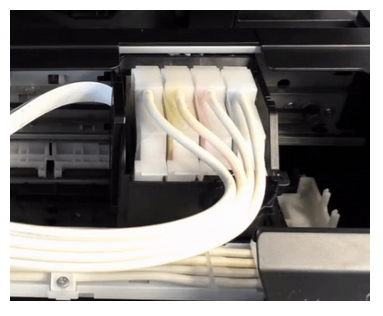
- You lot will see the print head compartment on the right side connected to the ink tanks with iv tubes.
- Switch on the printer and disconnect the power cable when the print head has started to move towards the centre.

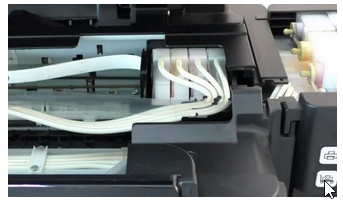
- Your print head compartment can be hands moved. Remove the plastic comprehend to go access to the ink tubes.

- Detach plastic tubes from the holder.

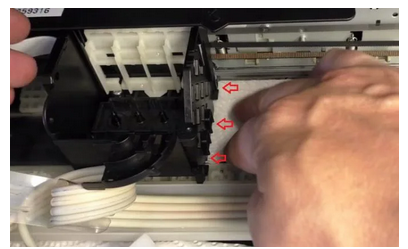
- Ink tubes are connected to a cartridge body. The cartridge body is installed in the ink head compartment with a retaining olfactory organ on its dorsum. You can easily unhook the cartridge body from the compartment by pushing this retaining nose from behind by using a screw driver or your finger. Perform this step gently to avert any damage to the cartridge body.
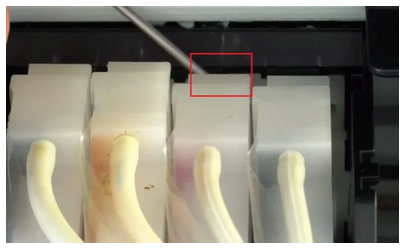
- In one case all the cartridges are unhooked yous can easily lift them out of the print head compartment.

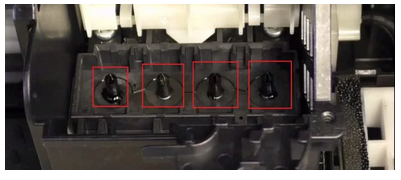
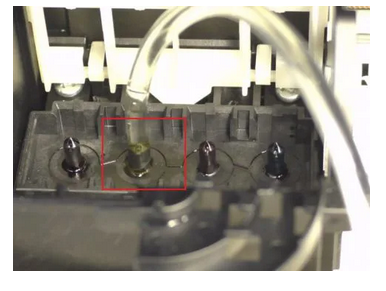
- Now all four ink ports in the print head compartment are clearly visible.
- Take a plastic strip and paper towel and fold them in such a manner that they tin can hands fit below the print head nozzle plate. Continue plastic below the newspaper towel.
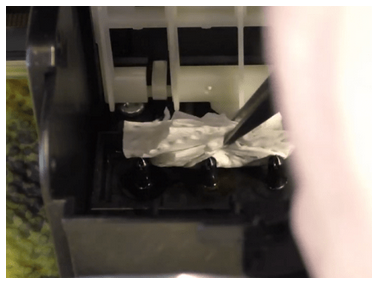
- To protect the inside of the printer during the cleaning process you should put this combination of plastic strip and paper towel below the print head compartment.
- Position the print head in the heart of the paper towel.

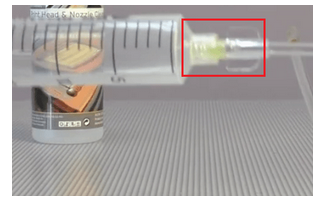
- Connect the silicon tube with the syringe and fill up syringe with the cleaning fluid.
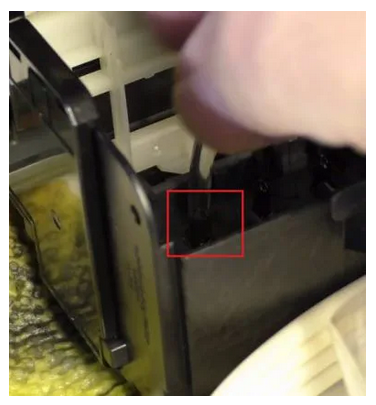
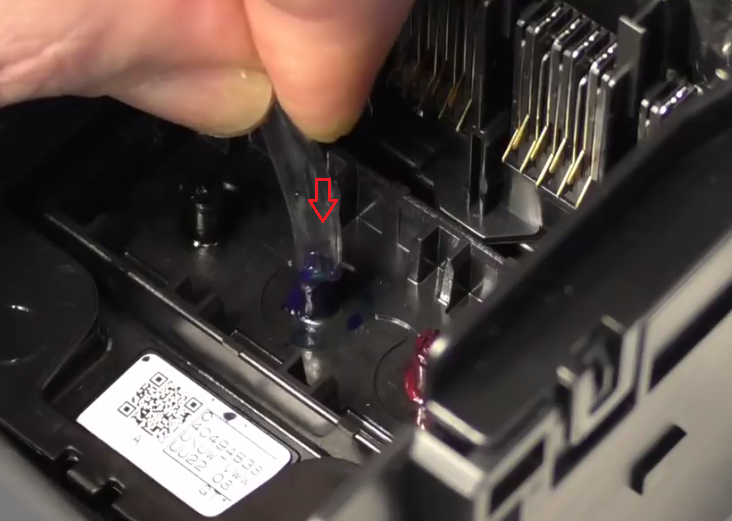
- Connect the open end of the silicon tube with the ink port you desire to clean.
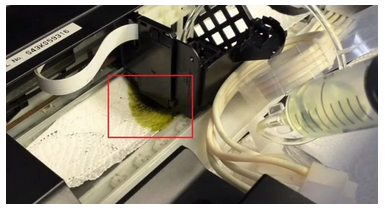
- Now gently push the cleaning fluid so that it tin can flush the ink blocking the nozzle. You lot will clearly see the paper towel getting wet with cleaning fluid of the same color whose ink port information technology was attached to. This is a sign that the ink in the blocked nozzle is getting cleared.
- One time the syringe is empty. Detach the silicon tube from the ink port.
- Clean the inside of the compartment with a piece of newspaper.
- Remove the dirty paper towel and plastic strip.

- If you want to clean another ink port, and then utilise a new plastic strip and paper towel. So, perform the steps from step xi to step 18 again.
- Reinstall the cartridges into the compartment.
- Brand certain that there is no twist in the ink tubes. Set up the ink tubes in the retaining holder of the print caput compartment.

- Adhere a plastic comprehend over the tubes.
- Close the printer cover. Switch on the printer and print the nozzle exam pattern.
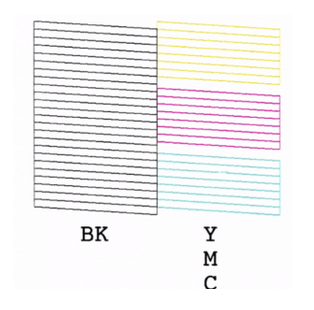
If you have performed all the steps properly, the new examination pattern should impress without any mistakes as shown above. That's it, this is how you make clean blocked impress caput nozzles of Epson Ink Tank printers.
How to Clean Ink Cartridge'southward Head (for Inkjet Printers)
Later arranging all the necessary things for the cleaning procedure, perform the steps given below in the same club as they have been mentioned.
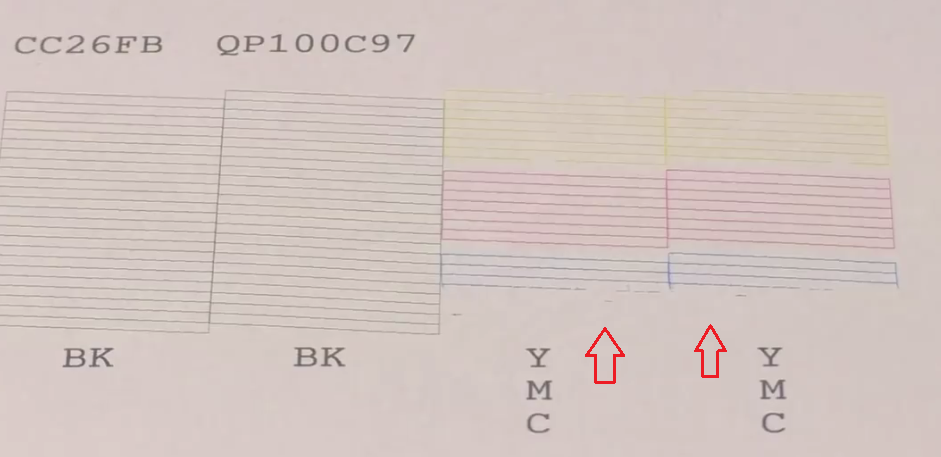
- Print the nozzle exam pattern to determine which nozzle head is blocked in your printer. In this case, y'all can clearly run into it'due south the Cyan colour nozzle. In your example, information technology can be another color or color. It doesn't matter which color nozzle is blocked, the cleaning process is exactly the same for each nozzle.
- Open the upper-lid of your printer to get access to its print head compartment.
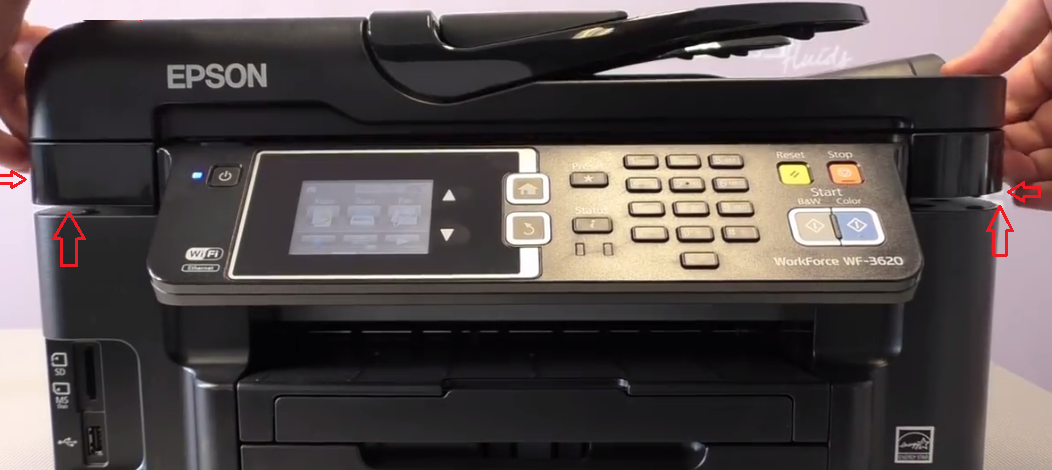
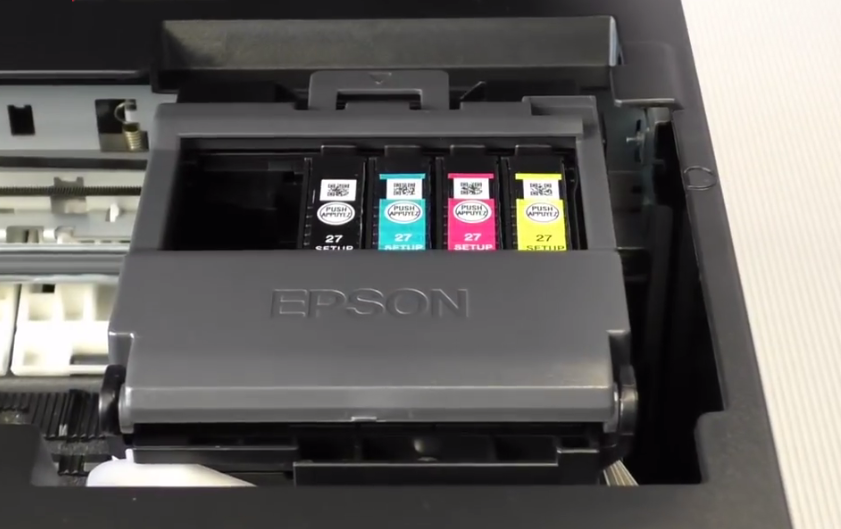
- On the right side, yous will detect the print head compartment which has all the cartridges.
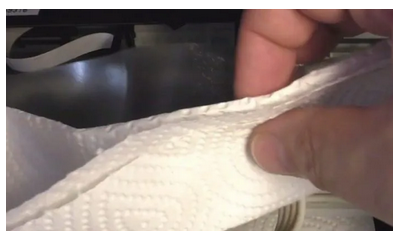
- Once you open the upper-hat your printer tin't work, simply we demand it to work to consummate the cleaning process. Therefore, you will have to span the contact switch using a function of a newspaper towel.
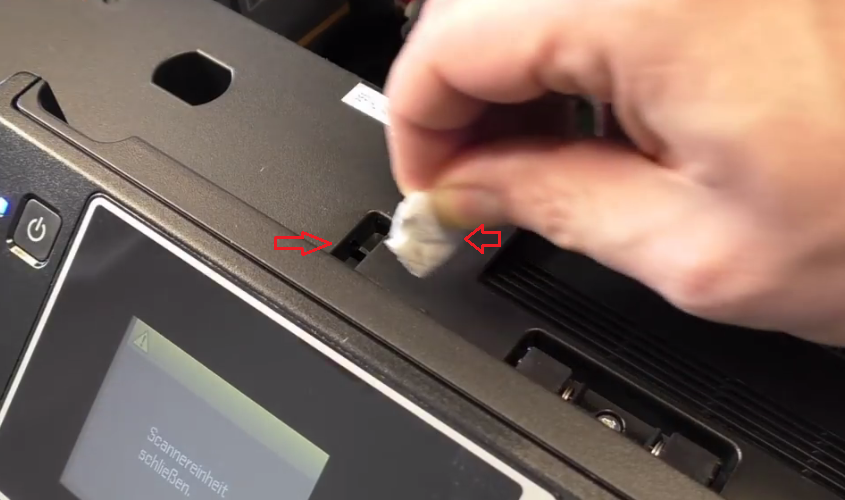
- After bridging the contact switch, you volition become admission to the normal operation of your printer.

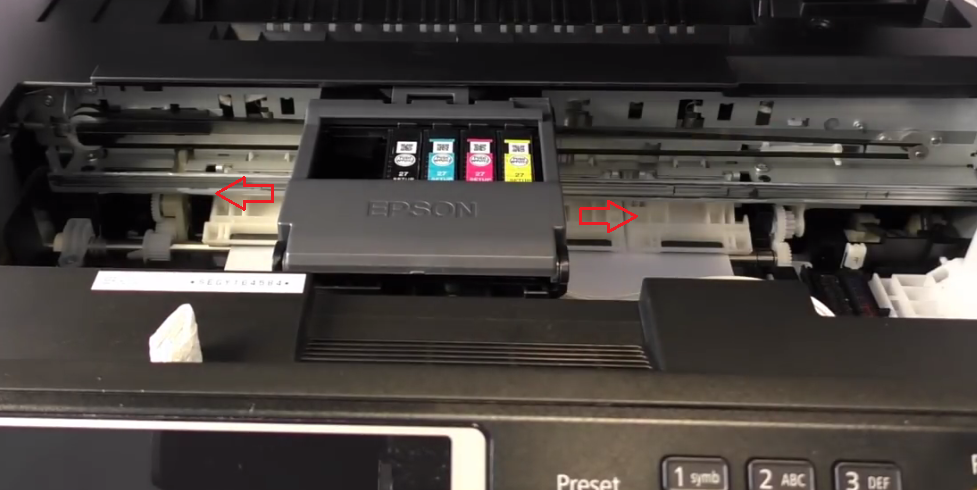
- At present, try to print a test page and as shortly as the print head compartment moves to the center, pull out the electric supply of your printer.
- Open the impress head compartment.
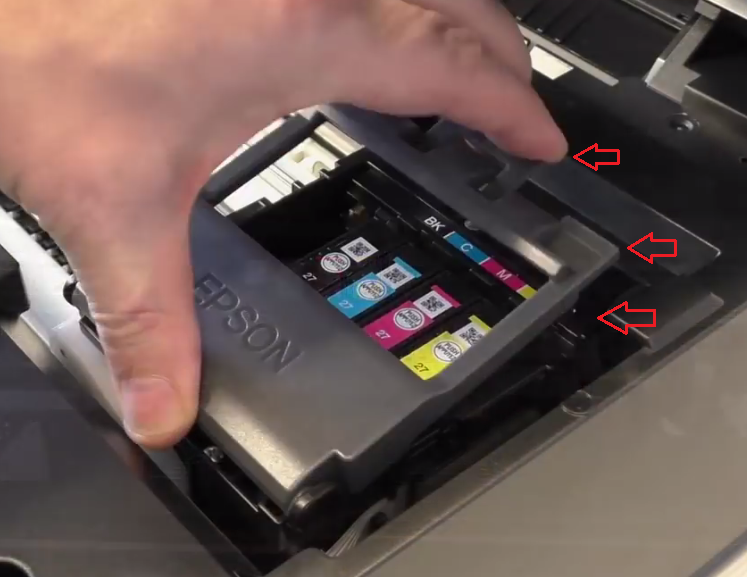
- Take out all the cartridges one-by-one.
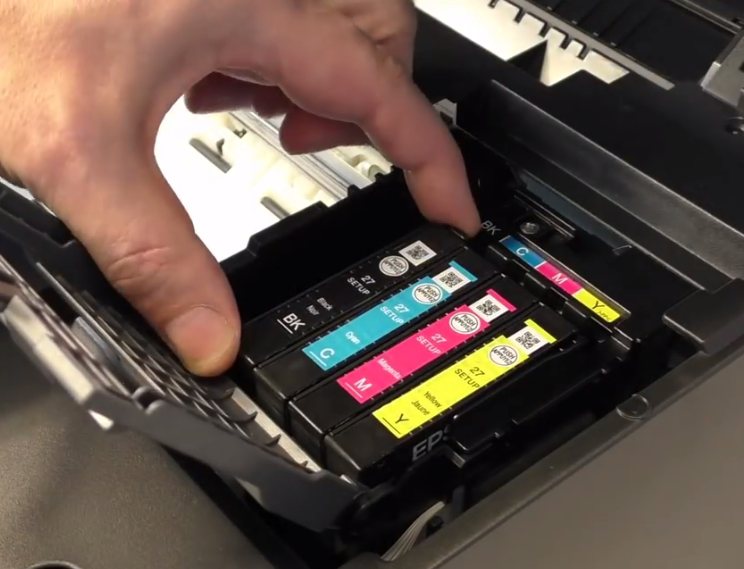
- This volition expose all the ink ports located below the cartridges.
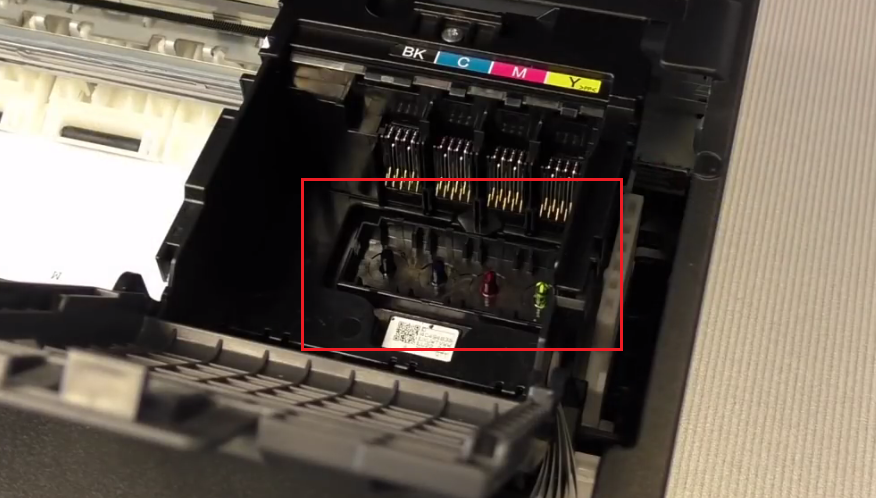
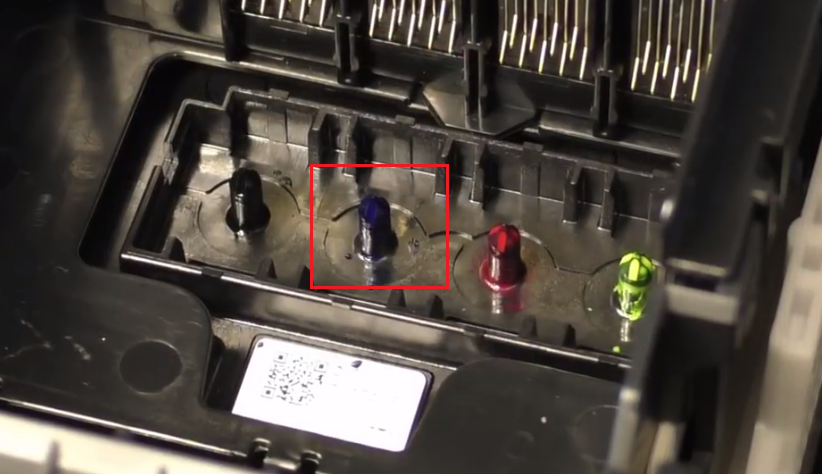
- You can hands recognize each ink port by its colour. Since nosotros have to make clean the Cyan ink port, we volition clean the 2nd ink port.
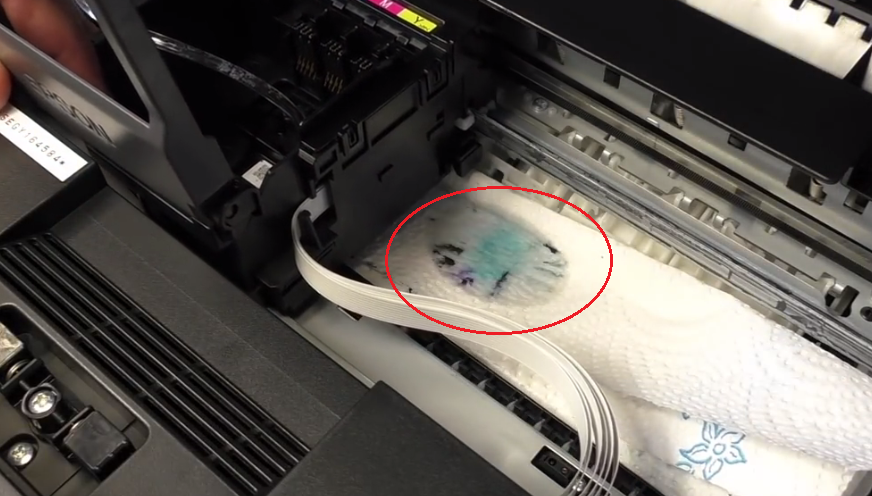
- To prevent the nozzle cleaner from leaking cleaning liquid into the printer we will put a newspaper towel below the print head compartment and slide the compartment over information technology.

- Having a newspaper towel below the print head compartment ensures minimal wastage of ink and protects waste ink tanks from filling upwardly.

- At present connect the syringe with the silicon tube and fill it with cleaning liquid or distilled water. Don't fill the syringe completely and make sure that at that place is some air in the syringe. This is important because air in the syringe will soften the pressure applied on ink ports.
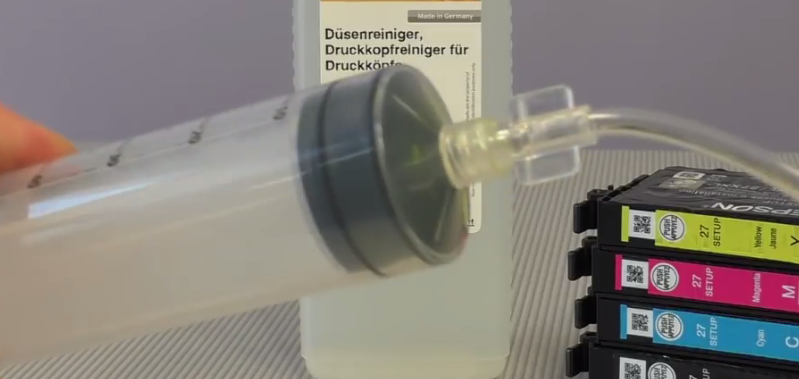
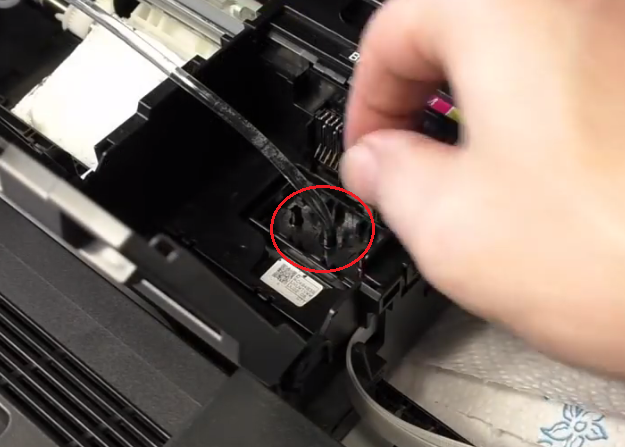
- Attach the open end of the silicon tube to the ink port you desire to make clean. In this instance, it'south the Cyan ink port. Push the tube on the ink port every bit far as you can, just don't use likewise much pressure. Try touching the end of the tube to the bottom of the print head compartment.
- Using the caput of the syringe, push the liquid towards the ink port. Don't put as well much force, effort to do information technology carefully. The air in the syringe will help in lowering the force per unit area.
When you move the caput of the syringe back-and-forth a few times it will commencement pull-upwardly the clogged ink, then it will flush out that ink from the bottom. Yous can see the whole procedure from the tube as the colour of the cleaning fluid will change when it starts to unclog the ink port. In this case, you tin see the color has inverse to Cyan.
- Afterward flushing out the chock-full ink you tin move the print head compartment and will find that the paper towel you kept below information technology in step 11 has absorbed all the waste ink.
- Now gently remove the silicon tube attached to the ink port.
- Clean the lesser of the print head compartment to remove whatsoever possible waste liquid.
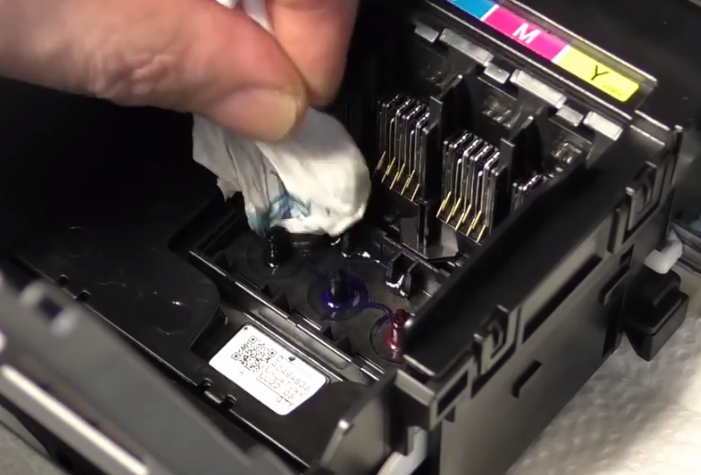
- Remove the paper towel kept beneath the print head compartment. Reinstall the cartridges and shut the print head compartment upper-lid.

- Reconnect the electric cablevision and impress the nozzle test design to cheque the results.
As y'all can see above that all the Cyan lines are clearly printed, which ways that the Cyan print head nozzle has been completely unclogged. However, if the lines are still non printing as normal or y'all think in that location is some room for improvement, then echo the cleaning process again.
Epson printers are the best among inkjet printers right now. However, like any other inkjet printer, they are susceptible to clogged nozzles. If you are experiencing this problem, then don't worry and follow the method mentioned in this guide to clean the Epson print head nozzles which are blocked in your printer.
FAQs
Ask a question similar the followings you'll become reply as soon as possible. It's completely FREE.
Searching...

Question: Epson printer l382 non used for six months needs cleaning for blackness ink tank! Scarlet bluish and yellow ink is doing fine.
Reply: I would advise to apply the caput cleaning from its software first and if it doesn't work, and so endeavour to clean it manually as given in the page higher up - wait for "inktank printer cleaning". Please go back with the issue.

Source: https://www.freeprintersupport.com/how-to-clean-print-head/
Posted by: rodriguezuntentoody.blogspot.com
0 Response to "How To Clean Epson Wf-2530 Print Head"
Post a Comment